PanelPocket Airplane Instrument Panel Phone Holder Pocket for iPhone
This PanelPocket airplane instrument panel phone holder pocket is listed as new and designed to keep a compatible iPhone securely within reach in an aircraft cockpit. It mounts to the instrument panel area to provide a dedicated pocket for your phone, helping reduce clutter during flight. The listing is in the eBay Motors category and includes free shipping. Check the listing for details on exact fitment, included hardware, installation method, and device compatibility before purchasing.


| Location | West Lafayette US |
| Shipping | Free shipping (check listing for details) |
| Seller |
secondlifeserver
100.0% positive · 813 feedback
|
| Listing | FixedPrice · Active |
| Start time | 2025-02-12T18:30:00.000Z |
| Brand | Unbranded |
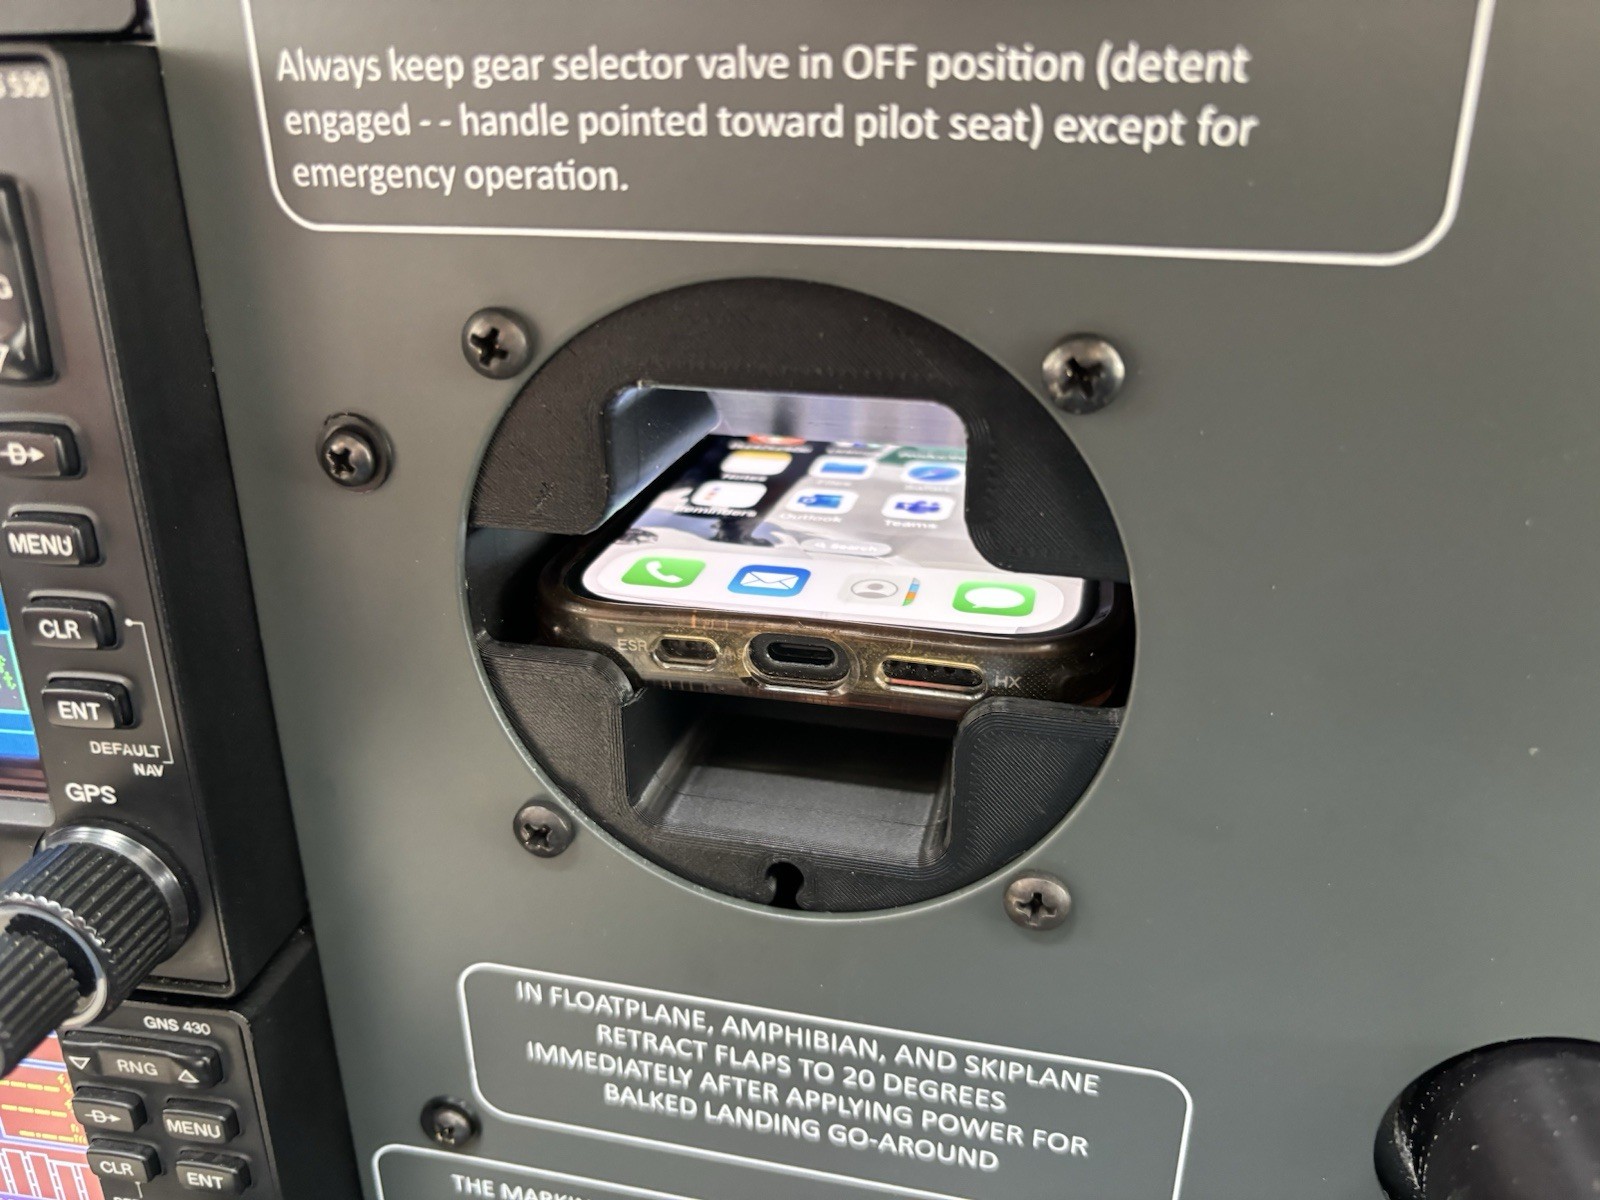
PanelPocket - A "dummy instrument" that holds your phone.Made in USA.This listing is for the black colored variant, there is also a gray colored version in our other listings.For experimental aircraft only, not an FAA certified part.Includes:Phone holder main unit, heatset inserts for screws. - Standard screw spacing for 3 1/8" instruments at 62.9mm (2.48in) square, 88.9mm (3.5in) diagonal. - Entire instrument is 84mm width, 84mm height, 182mm depth - Adjustable depth pocket so your phone is always in front.Does NOT include:4x screws1x Charging cable (optional)Supports: - Phones up to 16mm (0.63in) height, 80mm (3.15in) width, 112-172mm (4.4-6.77in) length. - Charging cables (optional) up to 4.5mm in diameter.Need something custom? Feel free to message your ideas. Instructions for install:1. Adjust phone holder depth: - Insert phone into main unit. - Inset limiting wall into backside and push forward until phone is at front. - Insert included wires through the holes in the main unit and limiting wall. - Bend the exposed ends of the wires (top and bottom) to set depth of phone holder.2. Add charging cable (optional): - Remove charging cable blank (at center-bottom) - Slide cable up through opening.3. Attach to instrument panel: - Place main unit behind instrument panel and align with screw holes. - Using 4x machine screws screw each into a corner.


![[BLACK] PanelPocket - Airplane Instrument Panel Phone Holder Pocket iPhone Plane](https://i.ebayimg.com/images/g/fcAAAeSwLmpoDYJV/s-l225.jpg)


