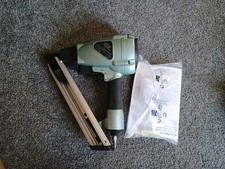
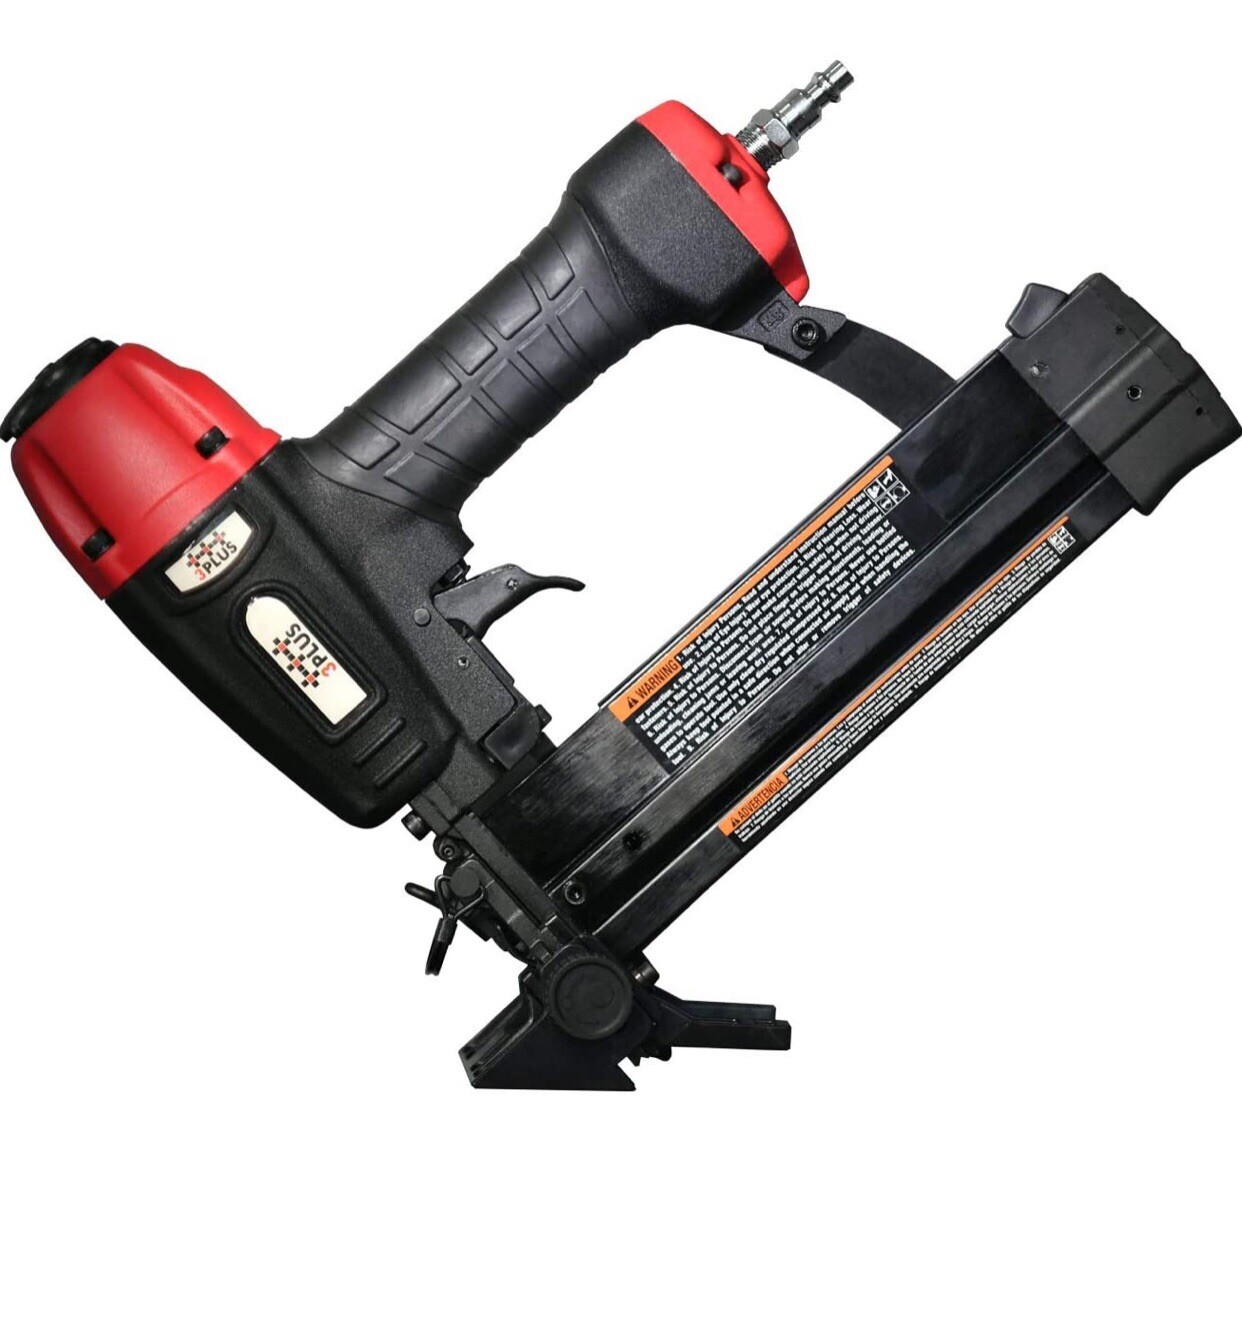
3PLUS HFS509040SP 4-in-1 Pneumatic 18 Gauge Flooring Stapler/Nailer BRAND NEW
Check the listing for details.


| Location | City of Industry US |
| Shipping | Free shipping (check listing for details) |
| Seller |
airtradmart
99.3% positive · 1131 feedback
|
| Listing | FixedPrice · Active |
| Start time | 2026-01-14T01:50:04.000Z |
| Maximum Working Pressure | 120 psi |
| Manufacturer Color | Red&Black |
| Color | Red&black |
| Custom Bundle | No |
| Item Diameter | 12x11.4x4.4inches |
| MPN | HFS509040SP |
| Item Length | 12in |
| California Prop 65 Warning | CA Prop 65 |
| Brand | 3 plus |
| Type | Flooring Stapler |
| Nail Gauge | 18 |
| Manufacturer Warranty | 1 Year |
| Item Height | 4.4in |
| Model | HFS509040SP |
| Country of Origin | China |
| Item Width | 11.4in |
| Item Weight | 4lb |
| UPC | 601116108682 |
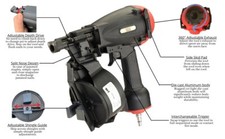
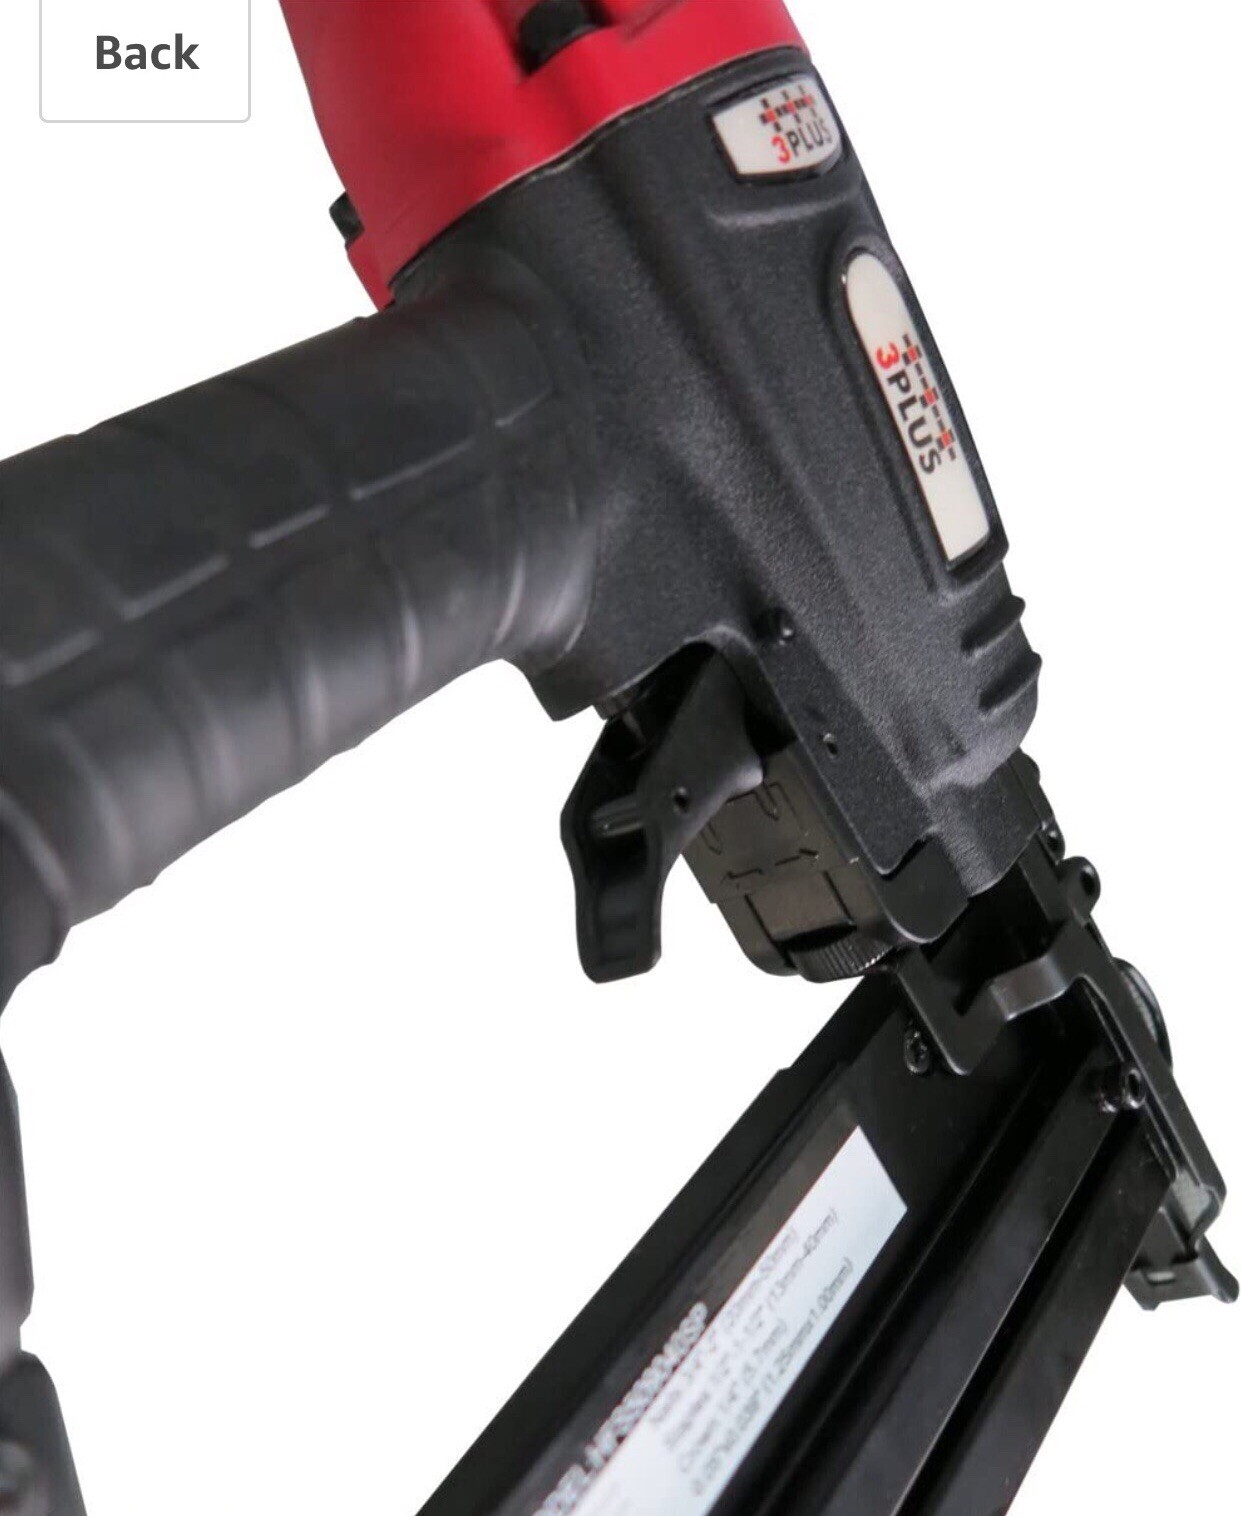
Product descriptionUses 18 gauge brad nails from 3/4” to 2” and 18 gauge narrow crown staples with 1/4” crown from 5/8” to 1-1/2” in lengthDesigned for 1/4''-5/8'' engineered or solid hardwood flooring;Easy to convert to as conventional combination stapler/brad nailer;Multi-directional exhaust cover rotates 360° to direct exhaust air away from user;Tool-free adjustable depth control device for proper setting of nail heads. Quick clear jam release functions for easy maintenance;REMOVING THE FLOORING SHOE1. Disconnect the tool from the air supply.2. Remove fasteners from the tool. Failure to do so will cause the fasteners to eject from the front of the tool.3. Lift up the D-shaped pin to an upper location(Fig.1).4. Pull down the quick release lever to release the flooring nose cover.5. Pull open the D-shaped pin with force, and take it off the pin slot, and then remove the flooring nose cover.6. Push the quick release lever back to the nose cover, and it becomes a regular 18 gauge nailer/stapler 2 in 1 tool, make sure the no mar tip is mounted.INSTRUCTION OF FLOORING SHOE ADJUSTMENT1. Take off the no mar tip(this is only for finish and trim works), no need to use the no mar tip for flooring installation.2. Adjust the thumb wheel to the deepest depth location.3. Loosen these shoe adjusting knobs to release the movable shoe and flooring contact piece in a flexible position.4. Place the contact piece on top of hardwood flooring , and push the nailer towards the hardwood flooring.5. Place the nose tip flush with the tongue corner of hardwood flooring. Once you are sure the contact piece is flush with the hardwood, and shoe is flush with the subfloor, fasten the adjusting knobs.6. Pull the trigger, the staple shoots through the tongue corner.Shipping with ground services.